A recipe is never just a recipe.
And this is why cookbooks continue to be books which are bought, flipped through and stained – with joy.
I recently took part in a mini discussion where someone told me that my self-publishing business was a risky one because free recipes were all over the Internet. I cannot argue with that. They are indeed all over the place. However (and many might disagree, but my work is not their cup of tea anyway), what we all need is not just the recipe, but rather the story accompanying it – those stories which used to be shared over a cup of coffee in the neighbourhood, when recipes were just scribbled on a tiny piece of paper torn from a notebook found in the closest kitchen drawer. The fine art of preparation was explained in great detail over a proverbial cup of coffee. And this is precisely why I don’t see my line of work as particularly risky. The recipes on my blog and those filling the pages of my cookbooks are just a bigger, more advanced version of those papers and the stories accompanying them. And there are still so many people craving proper human connection that comes along with them.
The recipe that follows is accompanied by a story so beautiful that it must be divided into two parts. The first one that I have here today is focussed on this amazing Polish delicacy and the next one will be full of gorgeous landscapes and chock full of photos. The links between the two are a young woman whom I not-so-secretly admire and my everlasting love of food photography.
I met Bea Lubas at a short food photography workshop in London back in 2017. I applied for the workshop knowing it would be short and therefore perhaps not as in-depth as I would have liked, but as a new mum whose head was teeming with both necessary and unnecessary worries I was in desperate need of something that would distract me from those thoughts and bring back my desire for Beauty. And that was precisely what I got. However, even more precious than that was getting to know two creative, intelligent and hard-working young women whose success makes me so happy as I admire them both from the other end of the world and the other end of the ‘Gram. One of them is Eva Kosmas Flores (more about that inspiring lady next time) and the other one is Bea Lubas, a UK-based food photographer of Polish origin and the sweetest soul you can imagine.
Bea made some pierogi for us on the first evening of our arrival to Istria, where I assisted her and Eva in organized a multiple-day advanced food photography workshop. At the table there were two amazing chefs, Bea, Eva, myself, a bowl of pierogi and a bottle of wine. With fire crackling in the fireplace what more could you wish for? Well actually, we all wished for a replay of the scenario and it was supposed to take place this time last year, but we all know what spring 2020 brought along so we’re all waiting for better times to come. And in the meantime, food is what connects us.

Also in the meantime – Bea put a part of her extensive photography knowledge between the covers of a beautiful resource under the title How to Photograph Food. As food photography has been part of my work for a decade, I have quite a few renowned books on the subject and I can easily say that Bea’s is the best one at the moment. For a long time I was a huge fan (and still am) of the book Plate to Pixel by Helene DuJardin, one of my first photography role-models, but time flies, trends come and go and Bea’s book is the most thorough, practical and the most relevant there is now.

Knowing her, I knew the book would be precisely like that so when the parcel she sent arrived, carefully packed, with a tiny Nom pinch bowl as an extra gift – it was Christmas time! #HoHoHo
I devoured the content of the book over a few evenings under the blanket, flagged the most inspiring parts and made pierogi for my husband a few days later. All in all, a very Bea-focussed week!


In that same vein, these photos as well are my attempt at interpreting her world. Every decent food photo tells a story (just like those scraps of paper from the beginning of this post!). And that story won’t necessarily be too obvious for the viewer. But if the photographer who constructs the image (and I am using the word construct intentionally here because oftentimes food photos are created rather than accidentally captured) knows what each element stands for, it is very much felt and appreciated, even without rational analysis.
Therefore I am offering you something I don’t normally do – an explanation for the elements in the photo below. I must say that none of the guidelines that follow are hard&fast rules and everything is based on personal impressions. Therefore, take all my ideas and explanations with a pinch of salt.

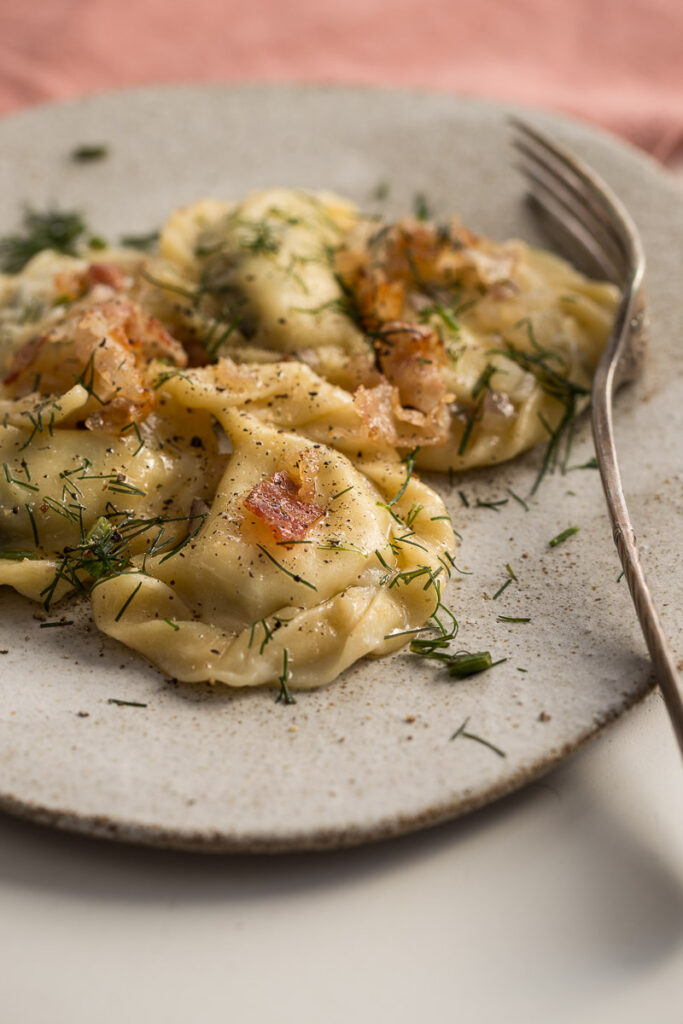
- Light– although Bea is a master of both light&airy and dark&moody style in food photography, I am most fond of her lighter work and I also see her as a cheerful person in whose company everything feels bright. Therefore I did not block almost any of the incoming afternoon light coming in from my south-facing window. I used a large diffusor to obtain soft shadows which won’t be too pronounced. The light hits the subject from the side which enhances the texture of the dish.
- Colour scheme – limited and inspired by the tones I associate with Bea. The background is predominantly white and the props are pinkish and beige.
- Technical specs: I used a tripod for this photo (I mostly shoot on a tripod because my hands aren’t steady), ISO 100, f5.6 (the food is on frocus and the book is discernible, but doesn’t take too much away from the star – pierogi), 1/125 shutter speed.
- Props – I use natural materials whenever I can and linen is among my favourites. This linen napkin fit the colour palette perfectly and the glass is in a matching tone. The plate was not chosen by accident. It is a hand-made piece by Tri Lukne, an artist whose pottery we used both for our meals and our demos in Istria. The Nom pinch bowl was a gift from Bea so it was only logical for it to find its place in this photo. The only Bea-unrelated piece is the fork. I wanted it to have a slightly worn and old look as the featured recipe is family lore, passed down from generation to generation.
And now that you know what you’re looking at, how about imagining what it tastes like? What is pierogi anyway?
Pierogi = Polish home-made pasta filled with curd cheese and caramelized onions. It is served with extra caramelized onions, some fried bacon if desired and a generous amount of fresh dill.
Sounds good?
The recipe is – of course – Bea’s, more precisely it’s a combination of her mother and her mother-in-law’s recipe. I am not as adroit as she is with rolling it out thinly so I doubled the quantities for the dough (and then had some left-over). The recipe below has double quantities listed in the ingredients so feel free to use a little bit less if you’re more confident in your pierogi-rolling skills than I am.

CURD CHEESE AND BACON PIEROGI
makes 50
FILLING
- 2-3 tablespoons of oil
- 4 medium onions, chopped
- 500 g potatoes, peeled, cooked and drained
- 500 g curd cheese
- 200 g bacon, chopped and fried
- fresh dill, chopped
- freshly ground salt and pepper
DOUGH
- 600 g plain flour + for dusting
- 2 eggs
- 40 g butter, melted
- 240 ml warm water
- pinch of salt
TO SERVE
- fresh dill
- chopped and fried onions and bacon
- freshly ground black pepper
Heat the oil on a frying pan, add onions and fry until gold. Mash the potatoes with the cheese, add the fried onions and mix together. Form 50 equal balls. Set aside.
Bring a large pot of salted water to a boil.
Prepare the dough, sift the flour onto a clean surface(or in a bowl), make a well, crack the egg in the middle and add add butter, salt, and pour the water slowly combining all the ingredients with a wooden spoon and then with your hands. Knead for 5 minutes until the dough is soft and elastic. If it’s still sticky add some more flour. Not too much because the dough will get too hard.
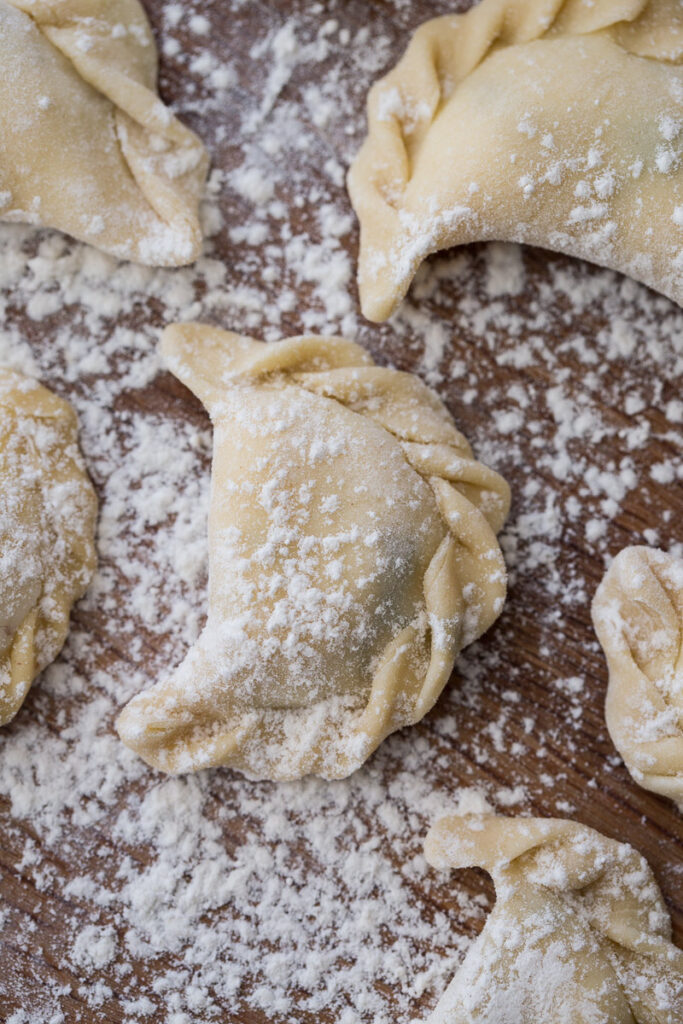
Divide the dough into four parts. Cover them with a cotton towel so they don’t dry out. Roll out the first one onto a lightly floured surface(quite thin – around 3mm),cut out circles very close together using (7cm/2,75″) glass, cutter or jar. Put shaped into a ball filling on each circle, holding it in your hand, fold into a half-moon and pinch edges, forming a well-sealed crescent. Transfer each one onto a lightly floured surface.
Repeat with the remaining dough.
Working in batches, transfer pierogi to the boiling water. They will sink to the bottom(stir them carefully so they don’t stick to the bottom, but be careful not to brake the dough) and then rise. Once they have risen, cook through, about 2 more minutes. Transfer pierogi into a bowl using a slotted spoon and drizzle with melted butter.
Serve with fried onions, bacon, fresh dill and freshly ground black pepper.